Installation
This page adds the CrowdySDK plugin to your project, enables it, adds the module dependencies your code needs, and points the project at your app.
Prerequisites
- Unreal Engine 5.8.
- A C++ project (Visual Studio 2022 with the Desktop C++ workload). Gameplay can be driven entirely from Blueprint, but the plugin compiles as C++.
Add a C++ class to a Blueprint project once (File, New C++ Class) and it becomes a C++ project.
Step 1: Get the release
Download the v2.24.0 release of the plugin from the public repository, CrowdedKingdoms/CrowdySDK-Unreal on GitHub.
From 2.24.0 the plugin root also carries a MIGRATION.md that lists, per release, what changed and the exact steps to migrate; read it when you update an existing project. The packaged zip of 2.24.0 is the first to include the plugin's Config/ folder (see What's Changed).
Step 2: Place the plugin at Plugins/CrowdySDK
Unpack the release into your project's Plugins folder so the plugin descriptor sits at:
YourProject/Plugins/CrowdySDK/CrowdySDK.uplugin
Create the Plugins folder if it does not exist. The first time you open the project afterwards, the editor offers to build the plugin's modules; accept.
A plugin mounted from anywhere else (for example through AdditionalPluginDirectories in the .uproject) is an External plugin, and Unreal silently drops the config it ships in Plugins/CrowdySDK/Config/*.ini. That config is load-bearing:
CoreRedirectsthat repoint content saved against the SDK's older single-module layout to the current modules, so older assets still load.AssetRegistrycook-tag exclusions that keep editor-only tags, left on assets saved by an older SDK, out of a packaged build's asset registry.- A packaging entry that cooks the plugin's shipped map profile (the per-map data asset that switches the SDK on; see Map profiles), without which a packaged build is inactive on any map that configured nothing.
Once the project opens in the editor (after Step 5), check the Output Log for Mounting Project plugin CrowdySDK. If the line says External, move the plugin.
Step 3: Enable the plugin
From the editor: open the project, go to Edit, Plugins, search for CrowdySDK, tick Enabled, and restart when asked.
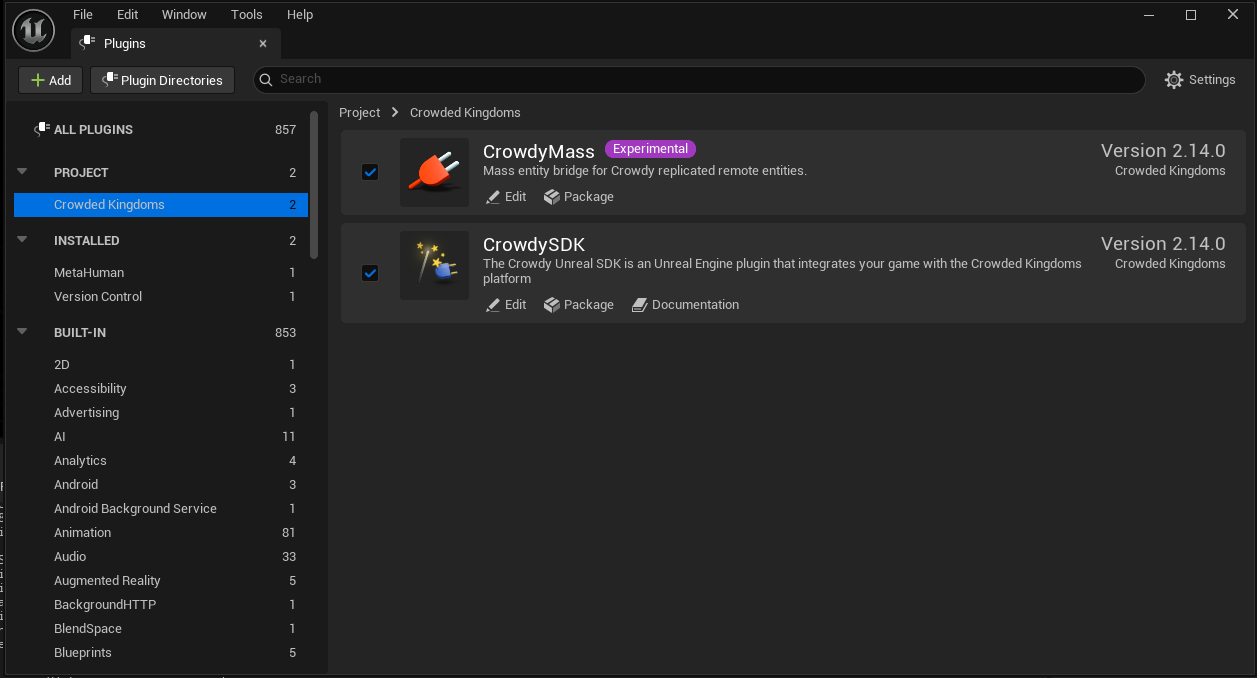
Or add it to your .uproject by hand:
{
  "Name": "CrowdySDK",
  "Enabled": true
}
Enabling CrowdySDK brings in all twelve modules in this table, including the two Mass modules, and the engine plugins they need (MassGameplay and MassCrowd). You never enable them one by one, and there is no separate Mass plugin to add. The engine marks MassGameplay and MassCrowd experimental, and they bring in the engine plugins they depend on (among them MassAI, ZoneGraph, SmartObjects, StateTree and PoseSearch), so every project with the SDK carries them and the engine's Mass processing runs each frame, even on maps that draw no crowd rows; the SDK's own Mass work runs only on maps whose profile selects the Mass backend. That holds since v2.19.0; on v2.18.0 and earlier CrowdyMass was a separate plugin, which a project upgrading removes from its .uproject. See What's Changed.
| Module | Type | What it holds |
|---|---|---|
CrowdySDK | Runtime | The top-level subsystem: login, connection, voice toggle. |
CrowdyReplication | Runtime | Entities, RPC events, Crowdy State, map profiles, project settings. |
CrowdyServices | Runtime | Authentication, teams, channels, avatars, host election. |
CrowdyNet | Runtime | The UDP transport, the API client, and the routing enums. |
CrowdyVoice | Runtime | Microphone capture, encode and decode, playback. |
CKSharedTypes | Runtime | Shared data types used across modules. |
CrowdyCppBridge | Runtime | The vendored native client the transport is built on. You never include it directly. |
CrowdyMass | Runtime | The Crowdy Mass Rendering Backend, which draws remote entities as crowd rows. See Draw a crowd with Mass. |
CrowdyNodes | UncookedOnly | The compiler checks for Crowdy-replicated variables. |
CrowdyMassNodes | UncookedOnly | The editor-side Blueprint nodes for crowd rows. |
CrowdySDKEditor | Editor | Turns event and state markers into Blueprint authoring surfaces and bakes them for cooked builds. |
CrowdyStudio | Editor | Crowdy Studio, the management console: sign-in, apps, Config Sync, authoring pages. |
The SDK has no Game Model API: the game API no longer serves game models, and the SDK dropped its side of them in v2.19.0. Keep the state your game must trust in your server code on ck-exec; see Move from Game Models and the two planes.
Step 4: Add the module dependencies
In your game module's Build.cs, add the modules your code calls. Most projects need these four:
PrivateDependencyModuleNames.AddRange(new string[]
{
    "CrowdySDK",
    "CrowdyReplication",
    "CrowdyServices",
    "CrowdyNet"
});
The voice toggle on the SDK subsystem does not need it. CKSharedTypes arrives through the public dependencies of the four modules above, so it rarely needs listing.
Step 5: Recompile
Regenerate project files and build:
- Rider or Visual Studio: right-click the
.uproject, choose Generate project files, then build. - Unreal Editor: accept the prompt to recompile on the next launch.
Or from a command line, which is what a build machine runs:
"C:\Program Files\Epic Games\UE_5.8\Engine\Build\BatchFiles\Build.bat" YourProjectEditor Win64 Development -Project="C:\Path\To\YourProject.uproject" -WaitMutex
The first build compiles the whole plugin and takes a few minutes. The log ends with Link [x64] UnrealEditor-CrowdyStudio.dll and Result: Succeeded. Expect a few warnings from a third-party header inside the plugin (a C4324 padding warning from the vendored client's spsc.hpp); they are harmless and repeat on every build.
Once it compiles, the SDK subsystems are available in both C++ and Blueprint.
Step 6: Connect your app
Open Crowdy Studio inside the editor, sign in, pick your app, and run Config Sync. It writes the connection settings into the project for you.
Until you run Config Sync for the first time, the project has no Backend of its own, so it dials the tier the plugin release you downloaded was built for: Production for a tagged GitHub release. See Project settings.
The network settings on UCrowdySDKDeveloperSettings (AppID, OrgId, Environment, DiscoveryUrl, GameApiHttpUrl, GameApiWsUrl, UDPProtocol, UDPTimeoutSeconds, HostPollIntervalSeconds) are read-only in Project Settings on purpose (they live under Project Settings, Plugins, Crowdy SDK). Crowdy Studio owns them; a value you type elsewhere is overwritten by the next sync. See Config Sync.
Related
- Crowdy Studio overview: open the console and sign in.
- Quickstart: your first entity, event, replicated property, and server-owned value.
- Map profiles: every playable map needs one before anything replicates.